


But practice makes perfection! Today, i want to do a basic tutorial, for how i try to do the basic black smokey eyes. Everything i use in this tutorial are basic necessities, and i think any makeup collector would have something similar. The purpose of this is to allow everyone a chance to replicate this tutorial if they chose to do so. You really don't need anything fancy!
This tutorial is best suitable for people
- with small eyelids
- clubbing or any fancy evening events
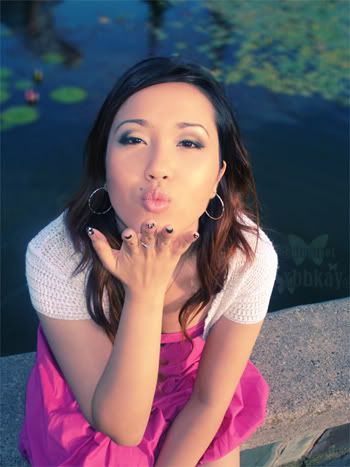
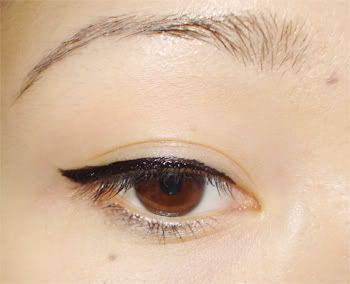
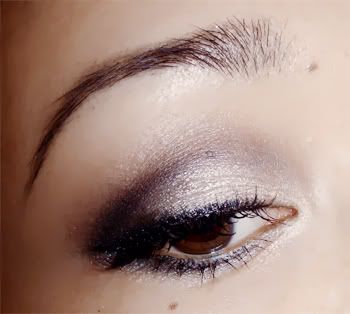
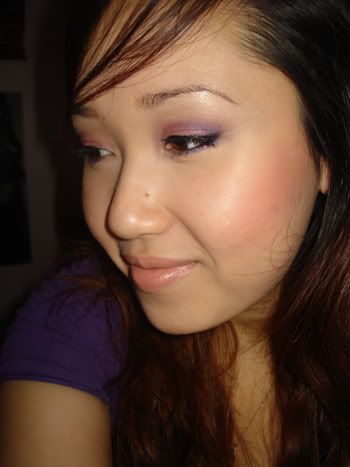
This is the finish look:

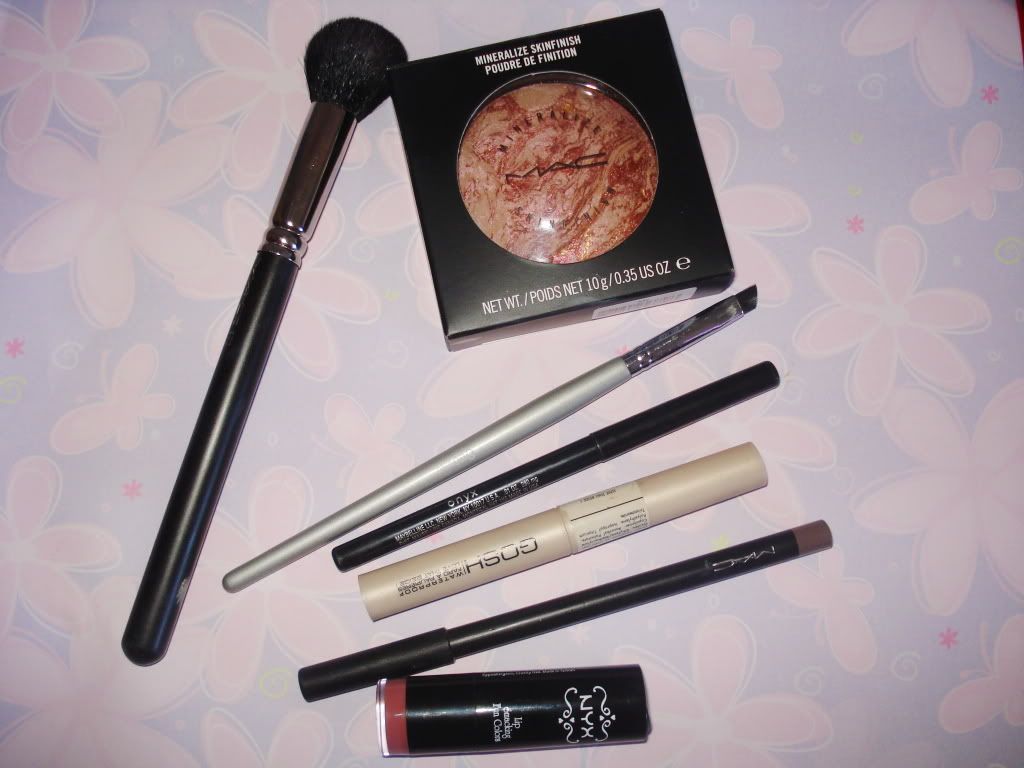
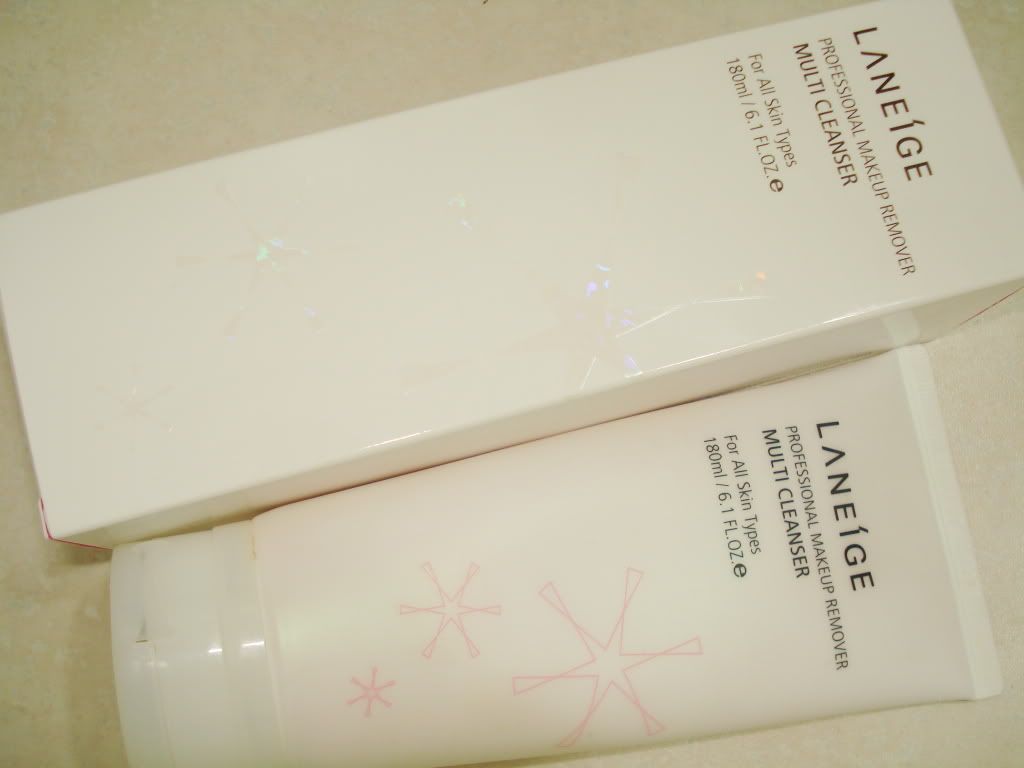
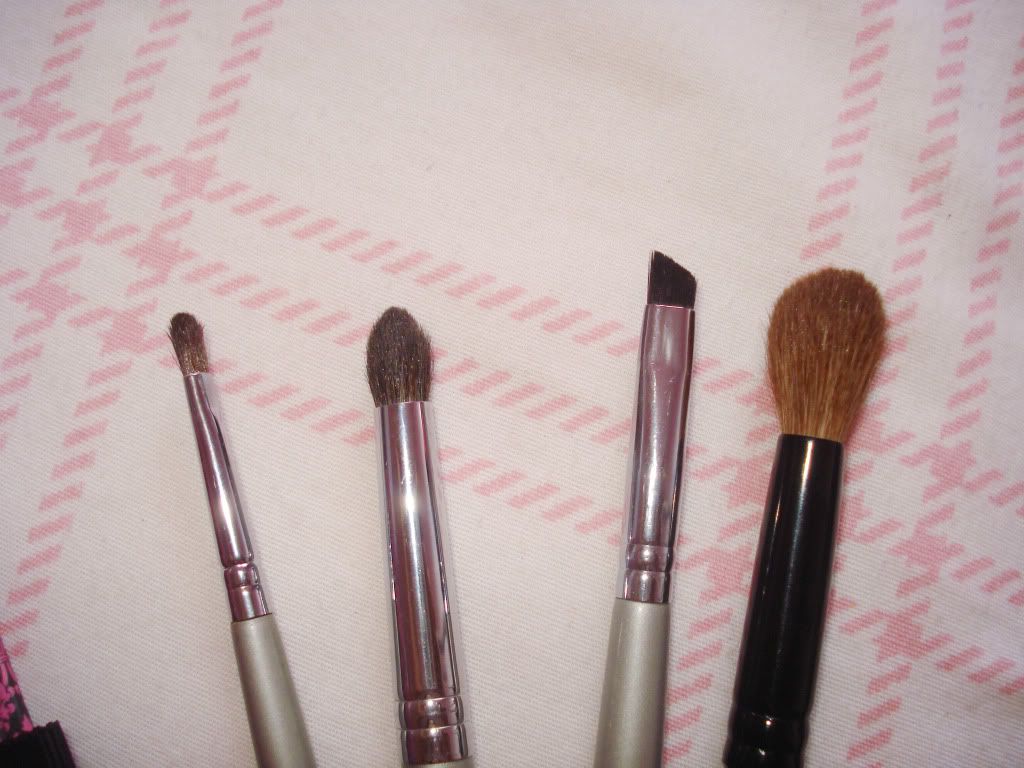
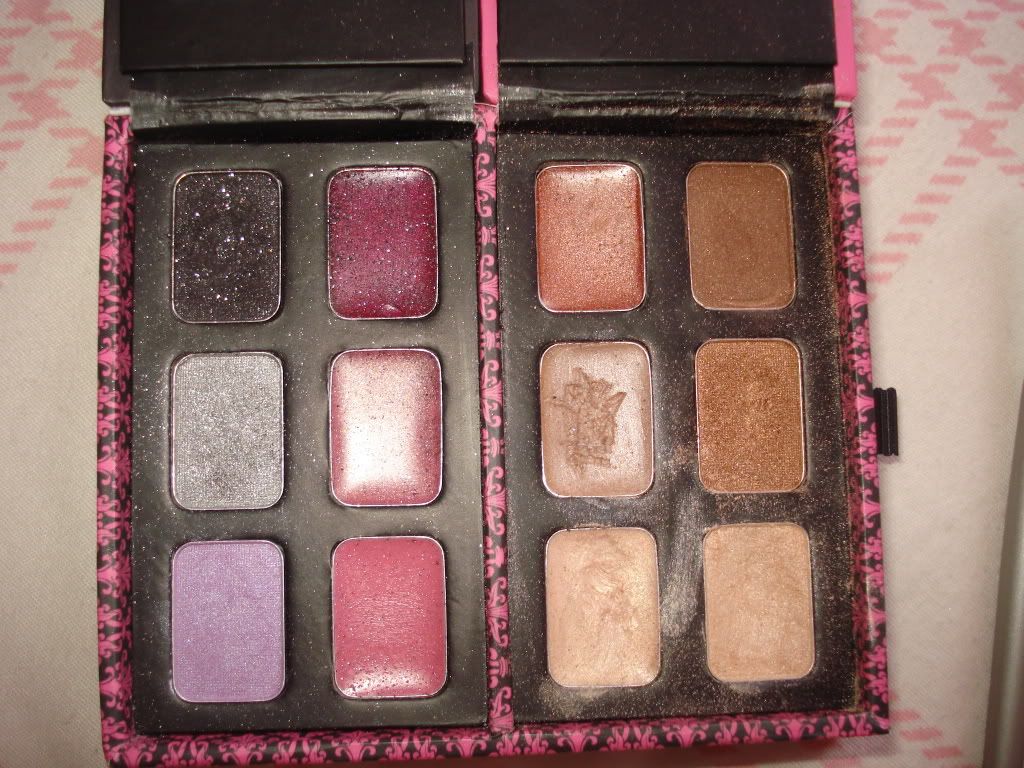
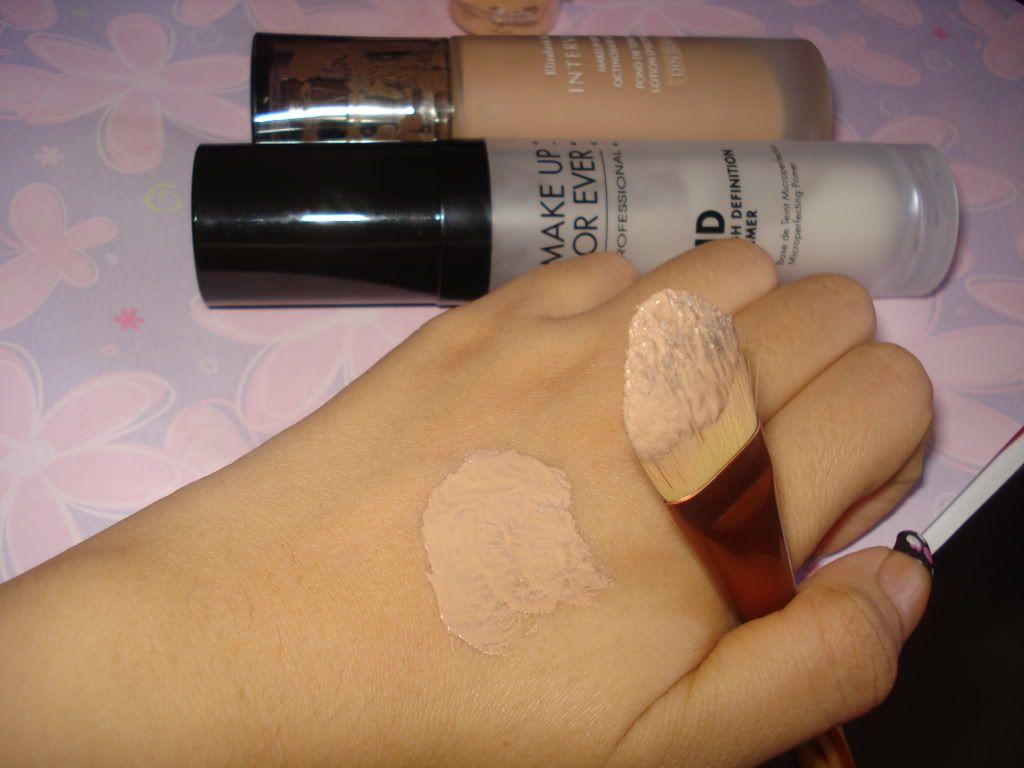
For this tutorial , this is everything that i used:
4 brushes - left to right
1. small shader brush ( u can use any larger shader brush, i just use this because the palette is small and i need a small brush)
2. crease blending brush
3. angled brow brush (perferrably it to be stiff & thick)
4. large blending brush ( to blend the harsh edges)
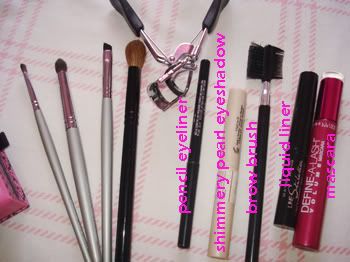
i used the shimmery pearl eyeshadow in the stick (above ^) & the champagne colour in this palette(below) on top of it as well as the black eyeshadow in this palette
okay, so let's get started
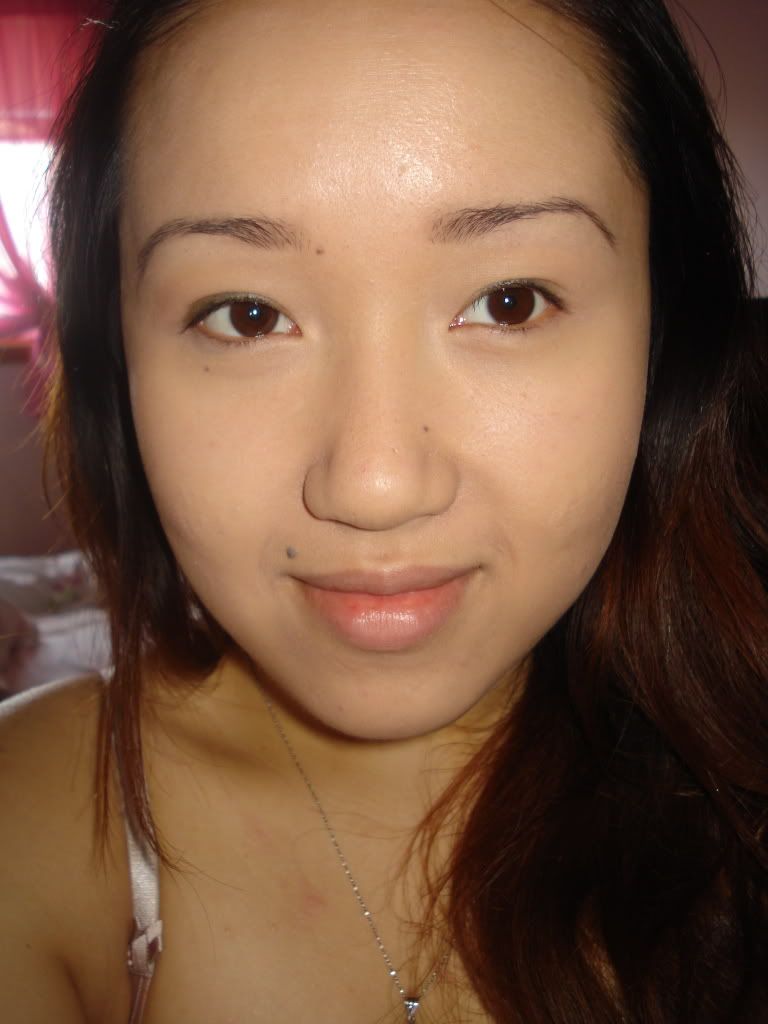
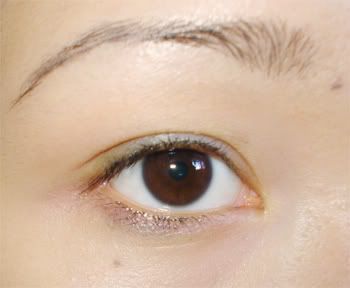
This is my naked eye, with some minor makeup residue remaining
Step 1
:Apply eye liner
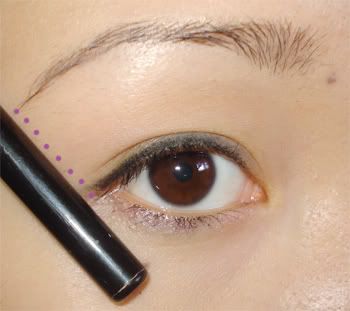 i use the pencil eyeliner and lined my eyes. For this part, you don't have to make it perfect. I also like to wing my liner at this point as well. I find that by doing this it helps me to create the perfect "smokey" eye shape later when i start blending in the crease. So i just take my pencil and line the end of my eye to the end of my eyebrows. This is the angle i want to "wing" my liner. Often times, when i don't do this, my eyes look droopy, because i tend to draw my liner too far out.
Step 2
:Wing your Liner
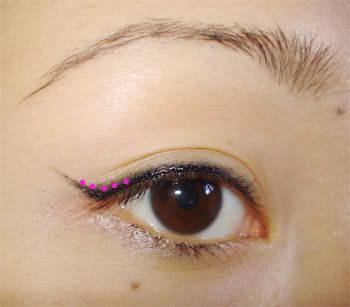 I use liquid eyeliner to wing my liner, because it's quick(no need to sharpen pencil) precise & no need to tug on the eyes! Using the LIQUID eyeliner, i start right at the outer corner of the eye, and flick directly up in the angle that I've already determined earlier. You should have something like this.
 Now you may have noticed a sharp and awkward bent in your eyeliner. So you just want to smooth it out, but filling in the corner. & you should get something like this. Optional : After you've done all that, just go over your entire eye again with the eyeliner & your eye should look something like this.
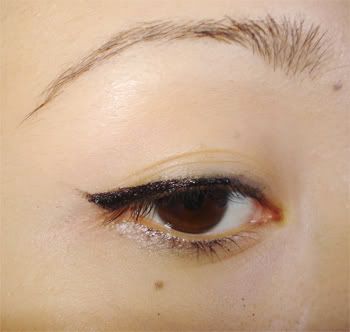
Step 3
:Finding your Crease
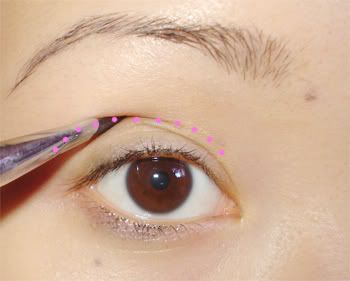
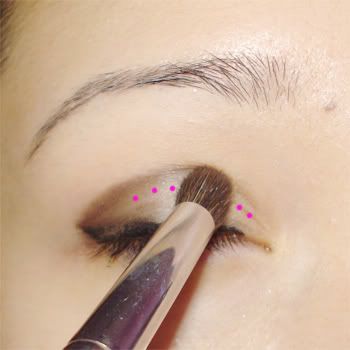
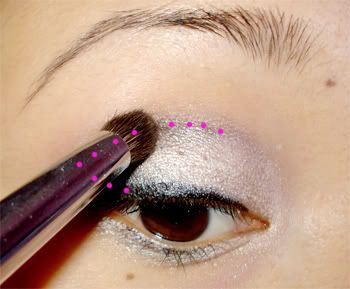
First, to make it easier you want to raise your eyebrow as high as you can, then using the Angled Eyebrow Brush you will need to sort of poke it into the hallow areas above my eyes. (raising the eyebrows make the crease more visible) This is where your crease is. You just want to use that brush and sort of poke it around your eye so you get an idea of where your crease is. Once you've done that, pick up some black eyeshadow and lightly trace (by stroking) your crease using the same "poking method". I would say this is the hardest part. In the pictures, i exaggerated the poking to make my point. You don't want to poke it hard.
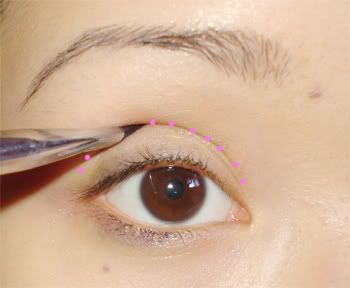
Step 4
:Trace your Crease
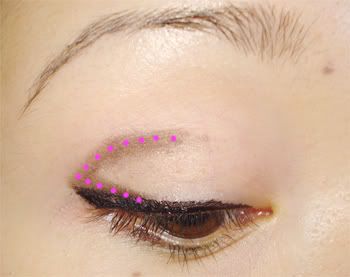
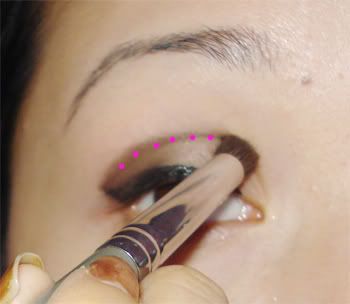
 Trace your liner to approximately the middle of your eye. Do not connect the end of the line to your eyeliner. The eyeliner that we have previous drawn in, guides how far i should trace/draw my crease. It should look something like this.
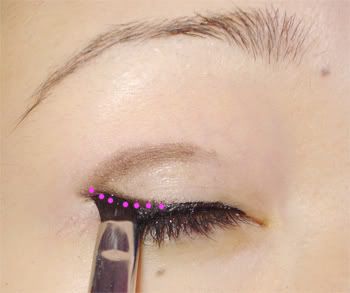
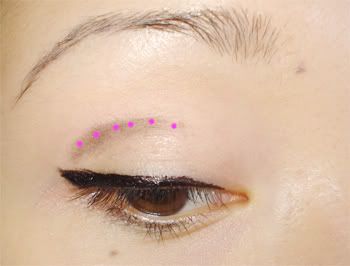
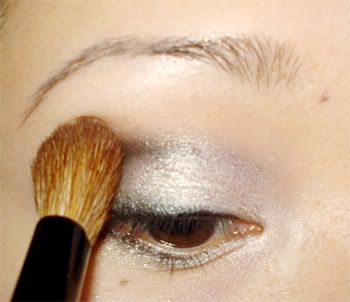
Now, using the same angled brush you want to stroke the eyeshadow slightly above your eyeliner and line it to the "crease line" that you have just drawn. You should have something like this in the end.
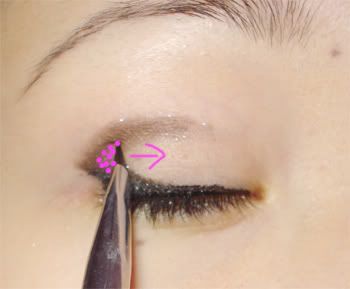
Now, you just want to hold the brush vertically and brush towards the right. This just blends out the black, and soften the "V" shape & it should look like this.
Step 5
: Blend out the Eyeshadow
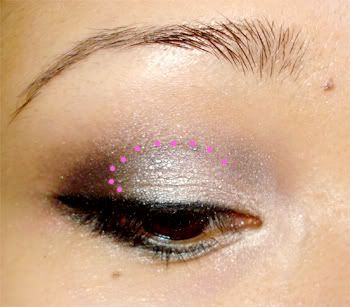
Using the crease blending brush now, you want to brush the black eyeshadow towards the inner corner of the eye & just slightly blend out the eyeshadow so the edges aren't so harsh. Smooth anything that you think is necessary. Do this in windshield swiping motion
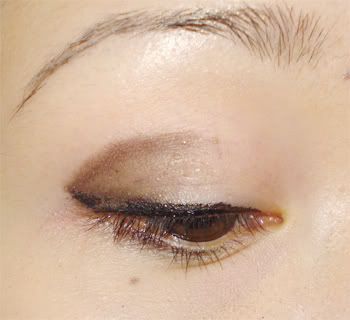
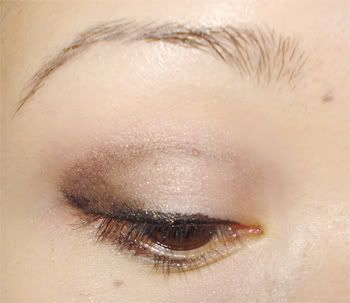 This is how it may look in the end
Step 6
: Applying White Shadow
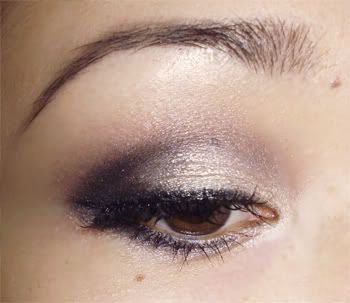
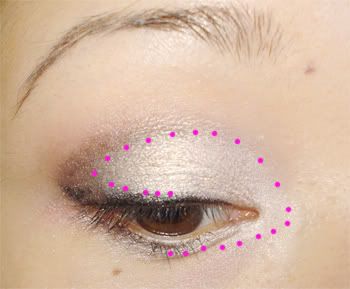 Now that you have everything basically "traced" out for you, you can easily apply the white eyeshadow. i apply it to the lid, and then the inner corner, and lower lash line. I used a shimmery pearl eyeshadow in a stick form with the champagne eyeshadow(from the palette) on top. You can use any colour. Shimmery eyeshadows compliment matte black eyeshadow very well. It gives you this extra "pop".
Step 7
: Darken and Perfect the crease
 Go back in with the crease blending brush and darken the crease (with many layers of black eyeshadows! LOL) to your desire. All the previous blending has probably washed it away.
Step 8
: Blend out harsh edges
 If necessary, just use a big blending brush and brush the edges to smooth out the harsh edges
Just re-apply your eyeliner, (water line) apply false lashes and your done!
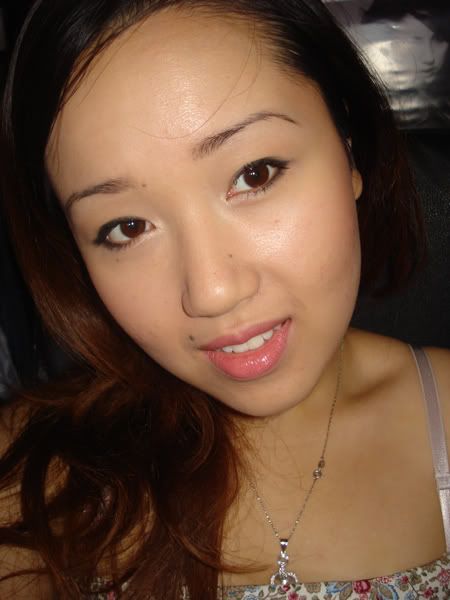
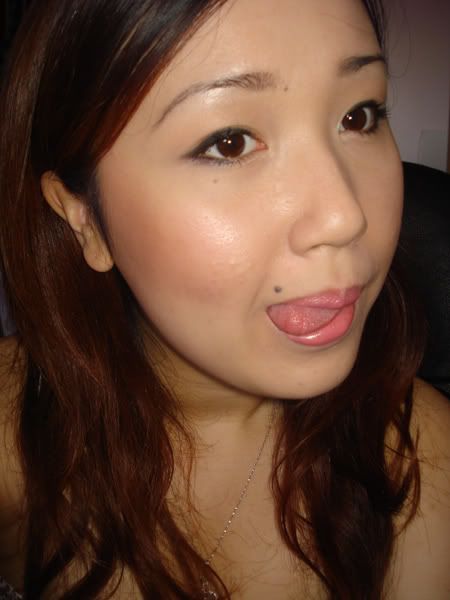
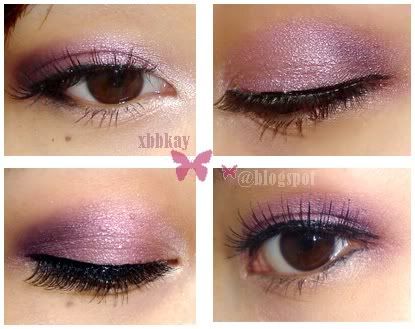
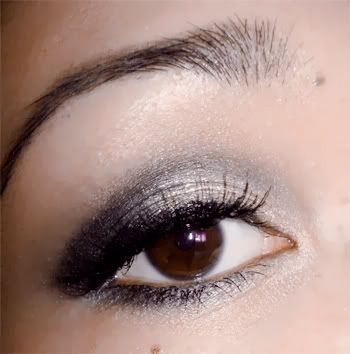
FINISH
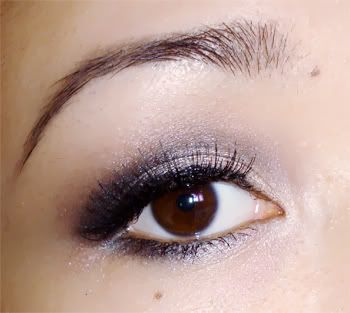
 (without false lashes) False Lashes MAKE ALL THE DIFFERENCE!
With False Lashes:
I hope this helped! I find it sooo much easier using the angled brow brush then using a crease brush only. Its much easier for me. Use any colour your like. Good luck and have fun~
P.S. i'm so surprised how many followers i've gained. I'd like to say Hello to all of you and thanks for following! Don't be shy to leave a comment. I'd love to hear from you guys!

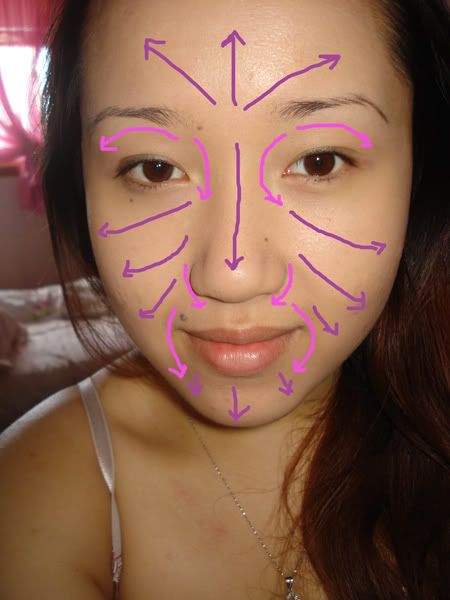 I like to stroke the foundation in the directions specified on the left (using the bigger brush side) The strokes in pink are the commonly missed areas. It's also areas that are slightly discoloured. If you have dark eye circles, you want to make sure to get into that corner, as that is where shadow is often casted. I like to go lightly around the eye area as well, because my skin is slightly lighter there, and you can sometimes see my vains for some reason. Also the area where i pluck my eyebrows are also much lighter then my face. You just want to even out your skin tone.
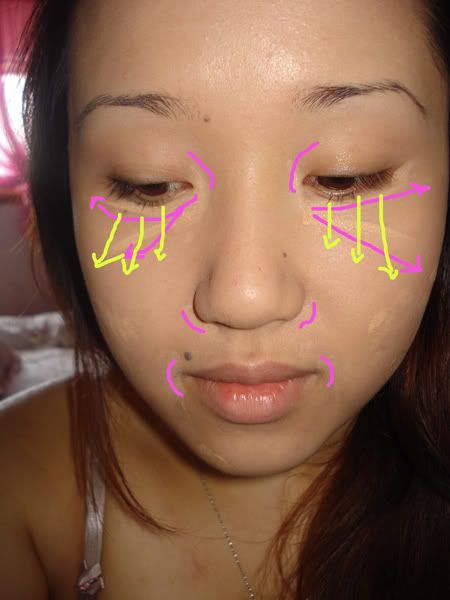 Next, i like to conceal any imperfection that the foundation could not completely cover with the other side of the foundation brush(small brush side). If your foundation gives you the coverage you desire then you can skip this step. For me, i like to conceal my under eye circles, areas where my skin is slightly more red/darker & any blemishes that are still visible
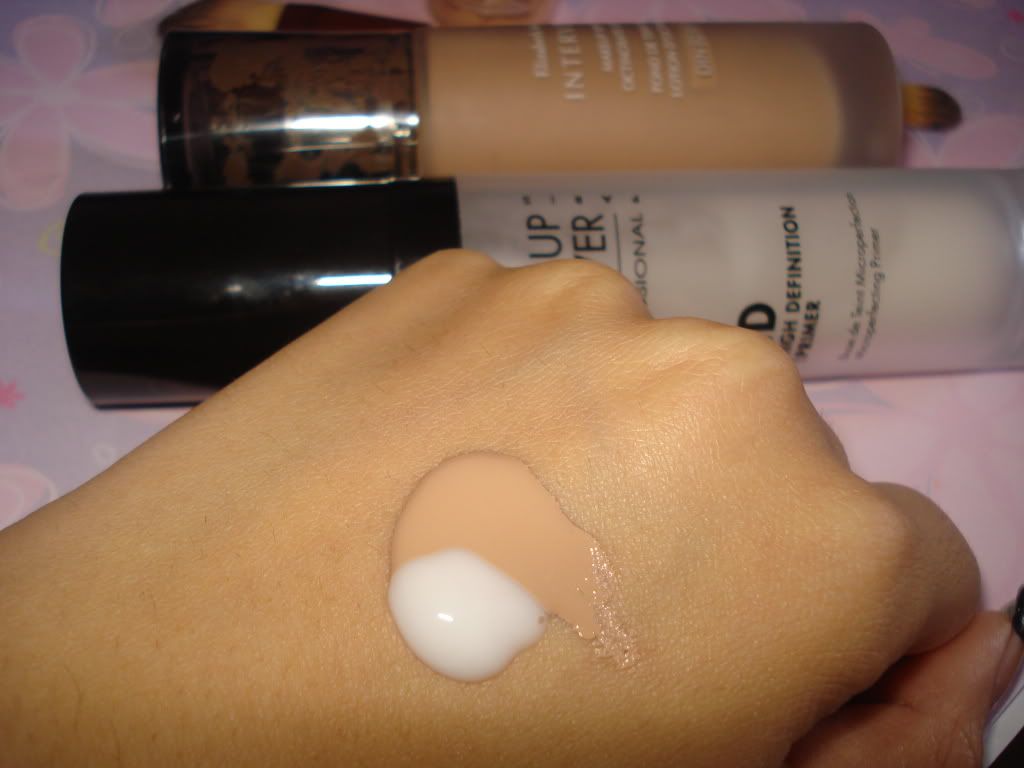
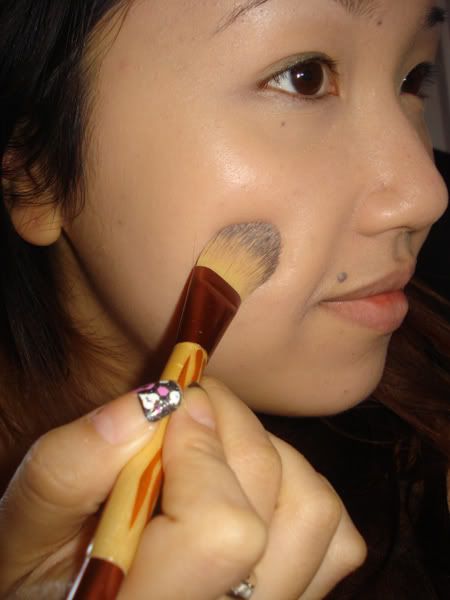 You may already be aware of this, but when you use this foundation brush to blend out the foundation, you may see some stroke lines. However, because i mixed primer with foundation earlier, my coverage is pretty sheer, so i don't see any streaks, but for people who do - What i like to do is using that same foundation brush ( the big side) and just pat it down. However this is my lazy way out. You are more then welcome to use a powder puff or one of these things. I have no clue what they are called.